DOWNLOAD YOUR BUDGET SHEET BELOW AND WATCH THE TRAINING OR TEXT INSTRUCTIONS BELOW
PART 1: CREATING YOUR CASH FLOW PLAN AND DEBT REPAYMENT SCHEDULE
PART 2: KEEPING TRACK OF YOUR BUDGET
Follow the steps to use this sheet effectively
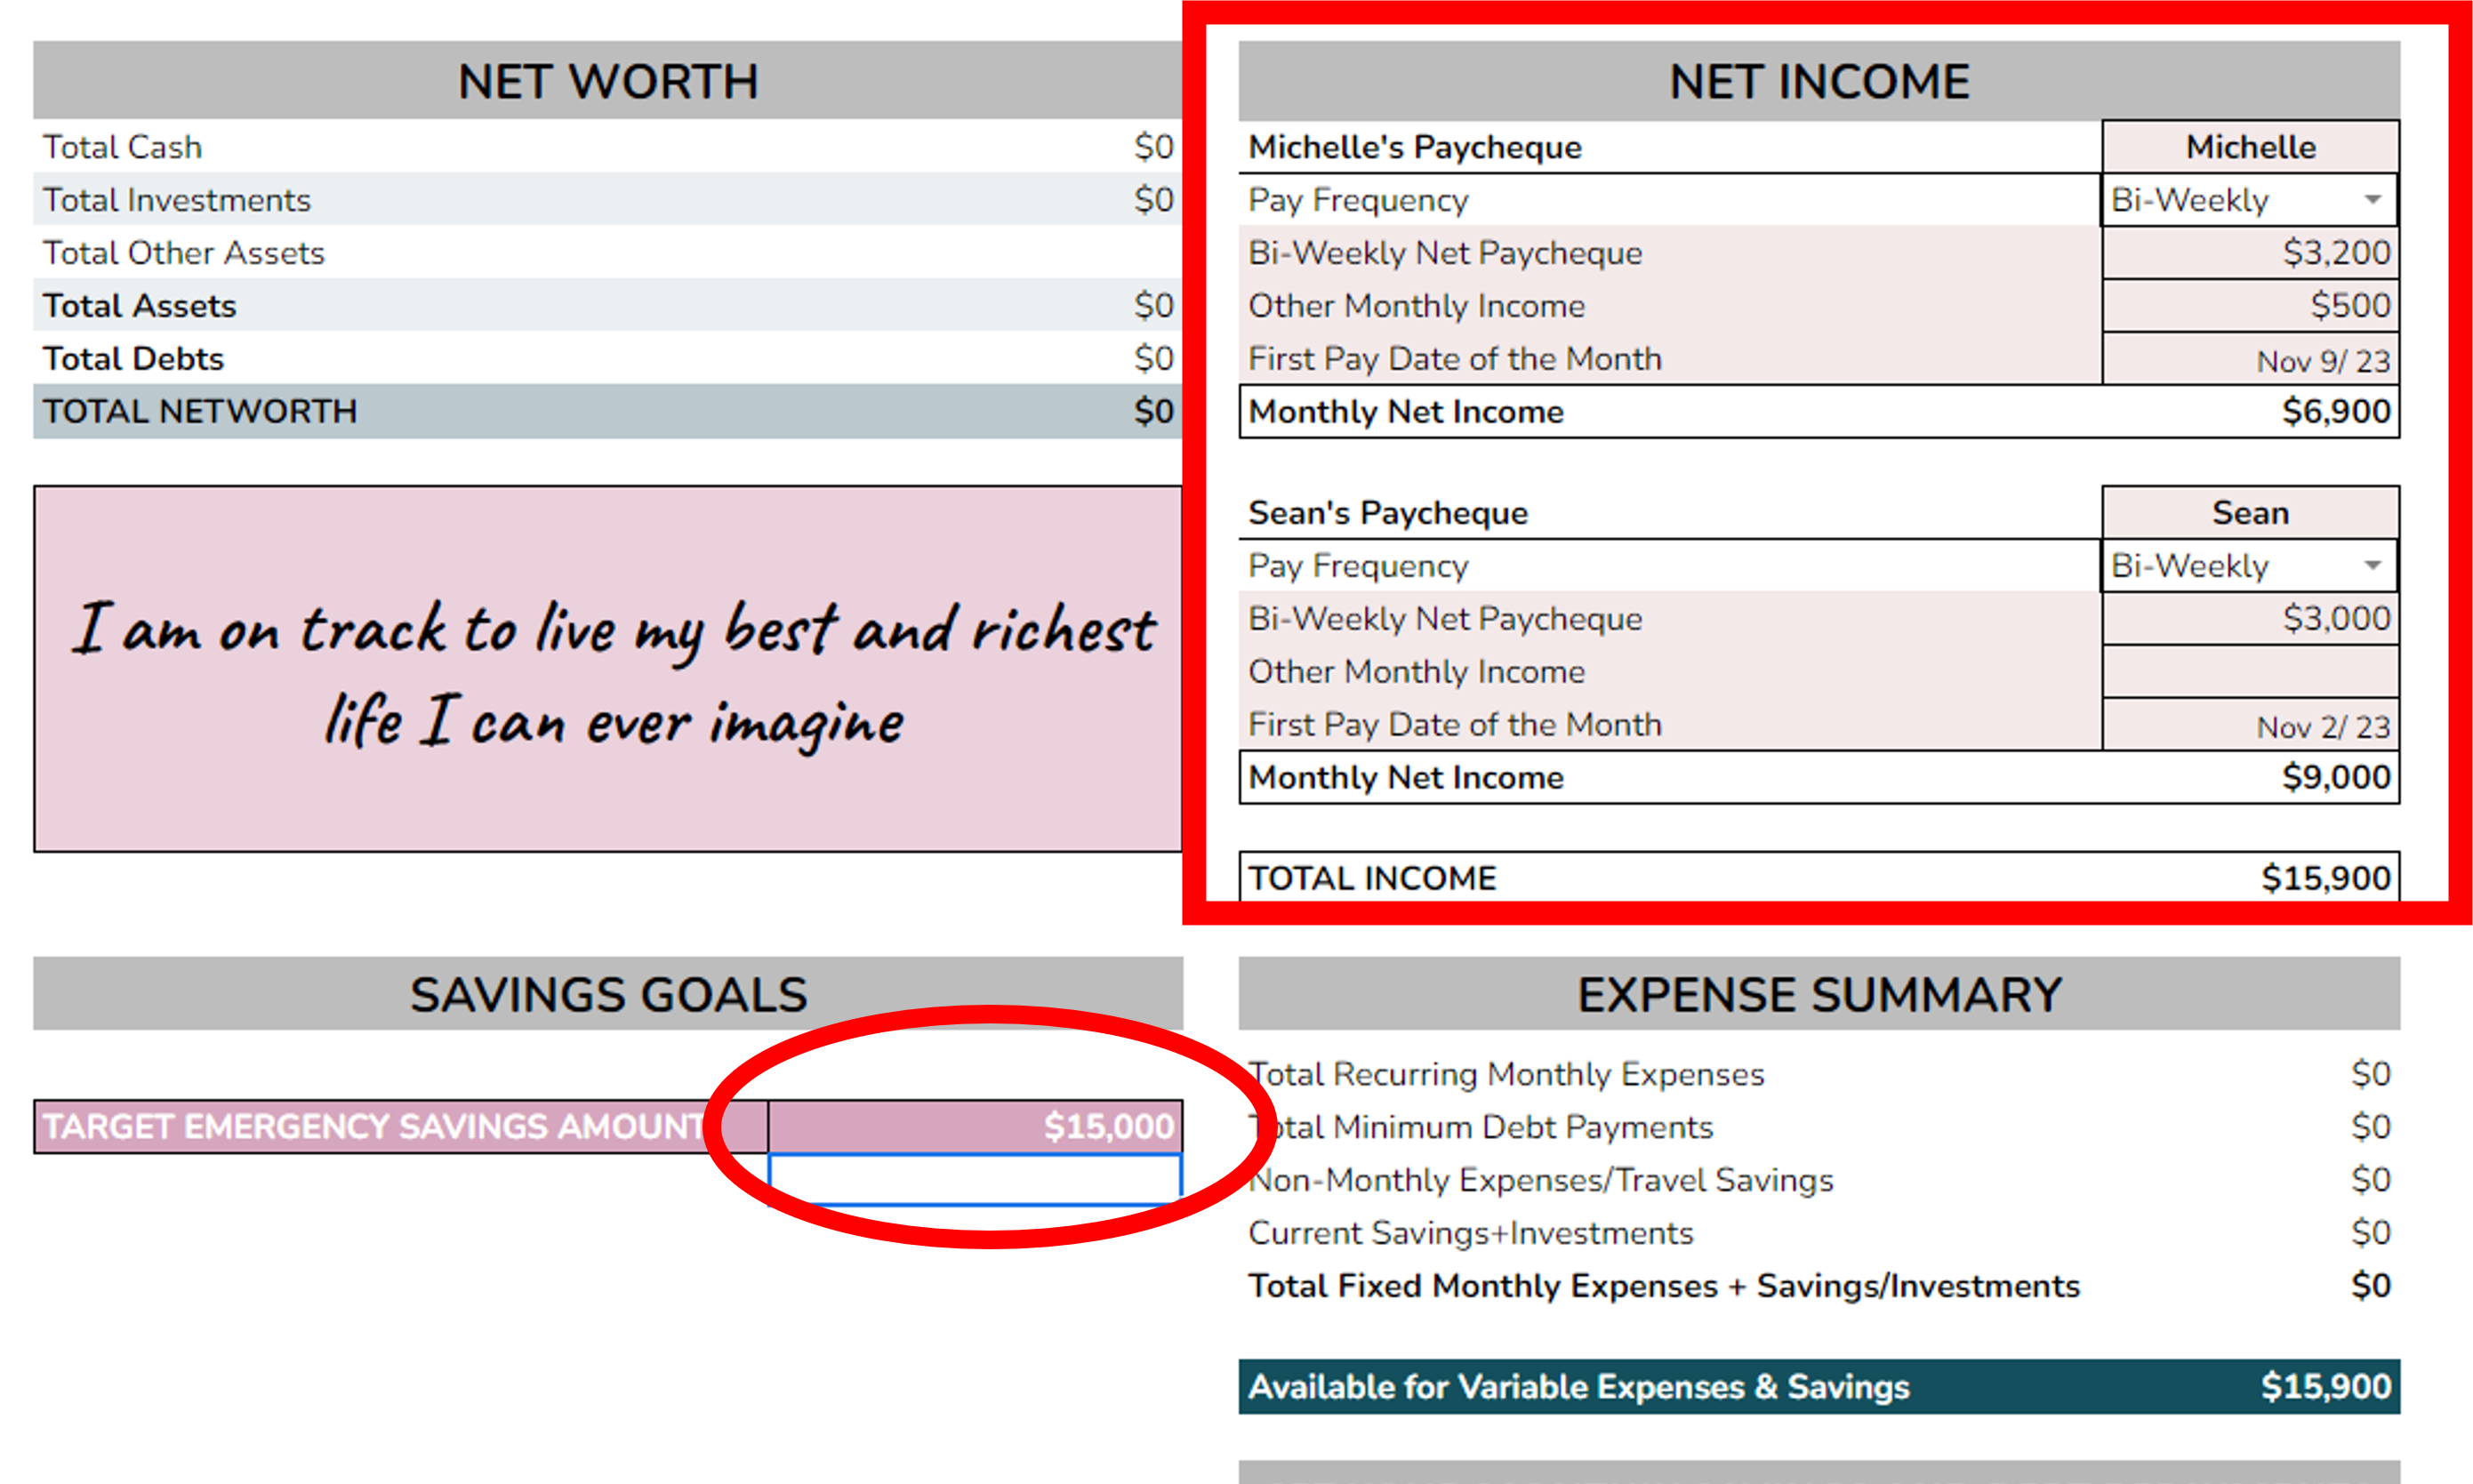
Step 1. Go to the Dashboard tab. Enter your net income and target savings goal.
Net Income. *UPDATED*
You can now add in two bi-weekly paycheques (for dual income household or if you have 2 jobs that pay bi-weekly)
Select your pay frequency and enter in your after-tax income from each paycheque. Enter any additional after-tax income you receive (e.g. side hustles, freelance income, government benefits).
Select the first pay date of the month (even if it has passed) - this is going to create your pay schedule going forward.
Enter your target savings goal for your emergency fund.
Step 2. Start with the 2nd tab, "Accounts and Debts"
Fill out the Cash Account Balances, Other Assets, Investment Account Balances, and Debt Balances, and what you're currently saving each month.
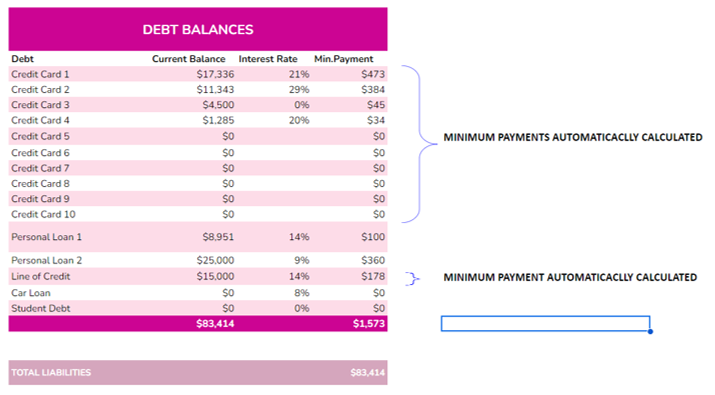
Credit Cards. Fill out up to 10 credit cards. Enter your current balance and the interest rate you're paying for each card. The minimum payment is automatically calculated.
Personal Loans. Fill out up to 2 personal loans. Enter the balance, interest rate, and the loan payment. The loan payment is not automatically calculated.
Line of Credit. Fill out up to one line of credit. If you have multiple line of credits, add up the balances and enter an average interest rate OR enter in the highest interest rate. The minimum payment is automatically calculated.
Car Loan and Student Debt. Fill out up to one each. Enter the balance, interest rate, and the loan payment. The loan payment is not automatically calculated.
Fill out the Cash Account Balances, Other Assets, Investment Account Balances, and Debt Balances, and what you're currently saving each month.
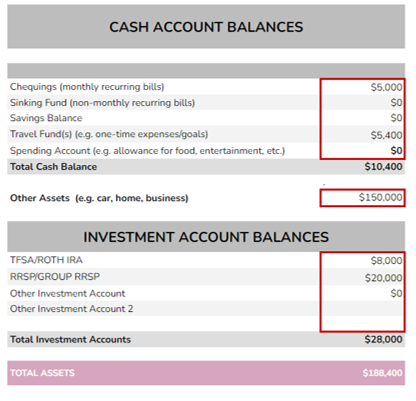
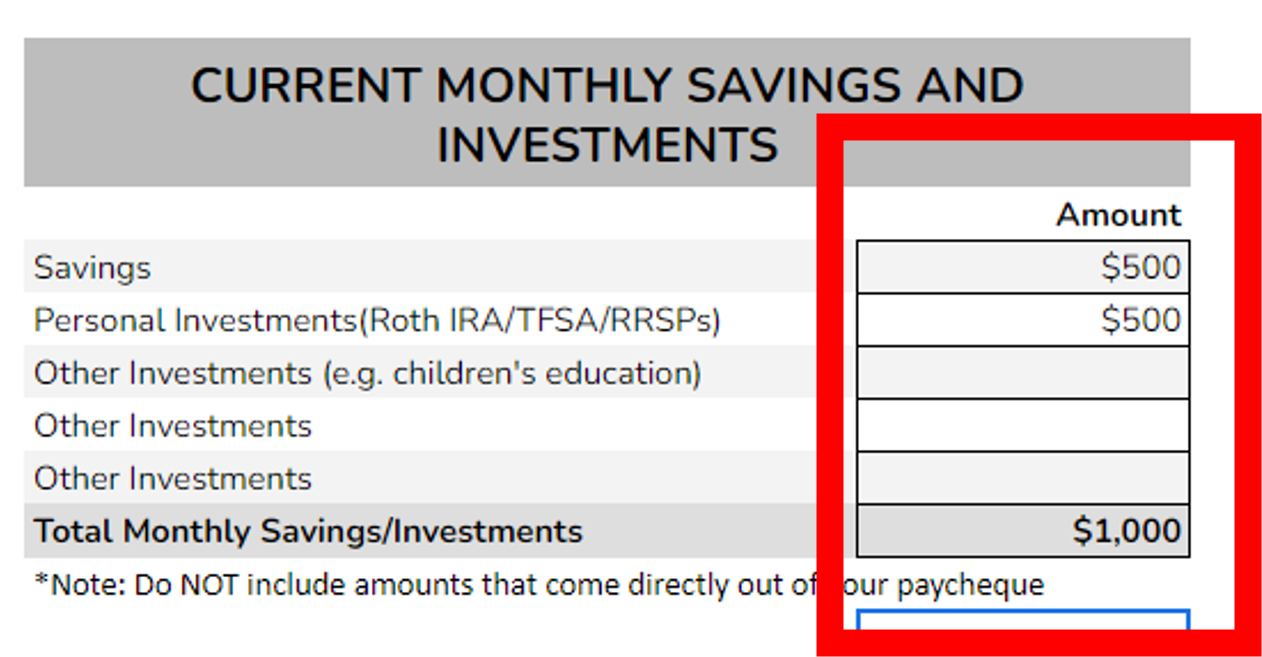
Fill out what you are currently saving in your savings and investment accounts.
Current monthly Savings and Investments.
Enter in how much you're currently saving. Do not include before-tax investments that come off your paycheque, like Group RRSPs, 401Ks, or pensions.
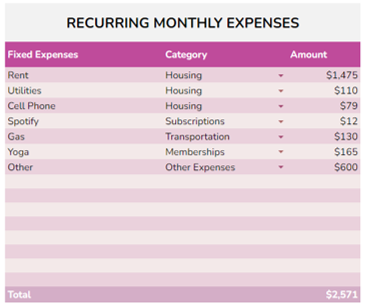
Step 3. Go to the Expenses tab. Fill out your recurring monthly expenses
Fill out your fixed monthly expenses, select the category and enter the monthly recurring amount.
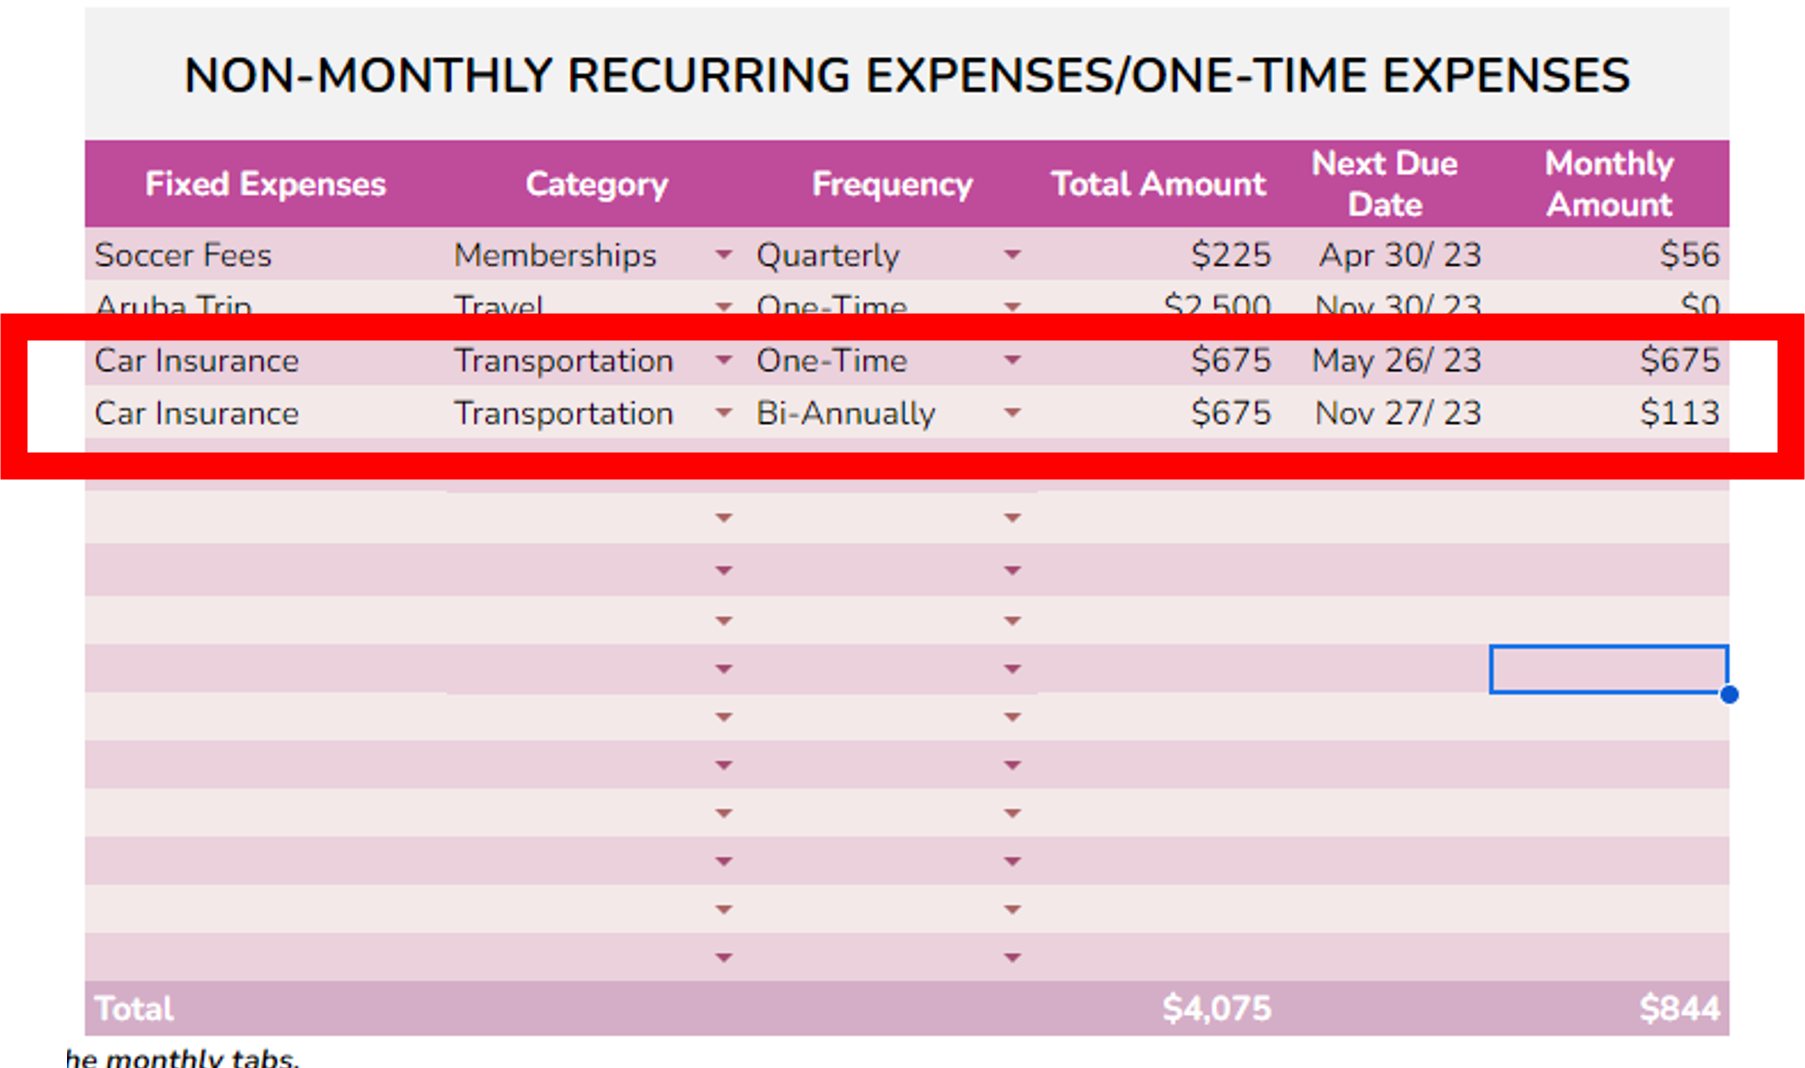
Step 4. Fill out your non-monthly recurring.
Non-Monthly Recurring Expense/One-Time Expenses/Trips & Vacation Expenses
Do a brain dump of all your non-monthly recurring expenses.
For example, if your car insurance payment is due twice a year, select bi-annually.
Enter the total amount that is due on those dates. (e.g. the bi-annual payment for my car insurance is $675 for a total of $1,350 for the year.). The monthly amount to set aside is automatically calculated for you.
When you enter in a trip, make sure you select it as "One-Time" under Frequency.
Note: If you have a big payment coming up and you have not been setting aside money for it, enter it in as a one-time expense, and then in another row
Travel Savings Tracker
The travel savings tracker will prioritize all your trips by earliest travel date. No need to do anything here here! It will show your progress and how much you need to be setting aside each month for trips that have not been saved for yet.
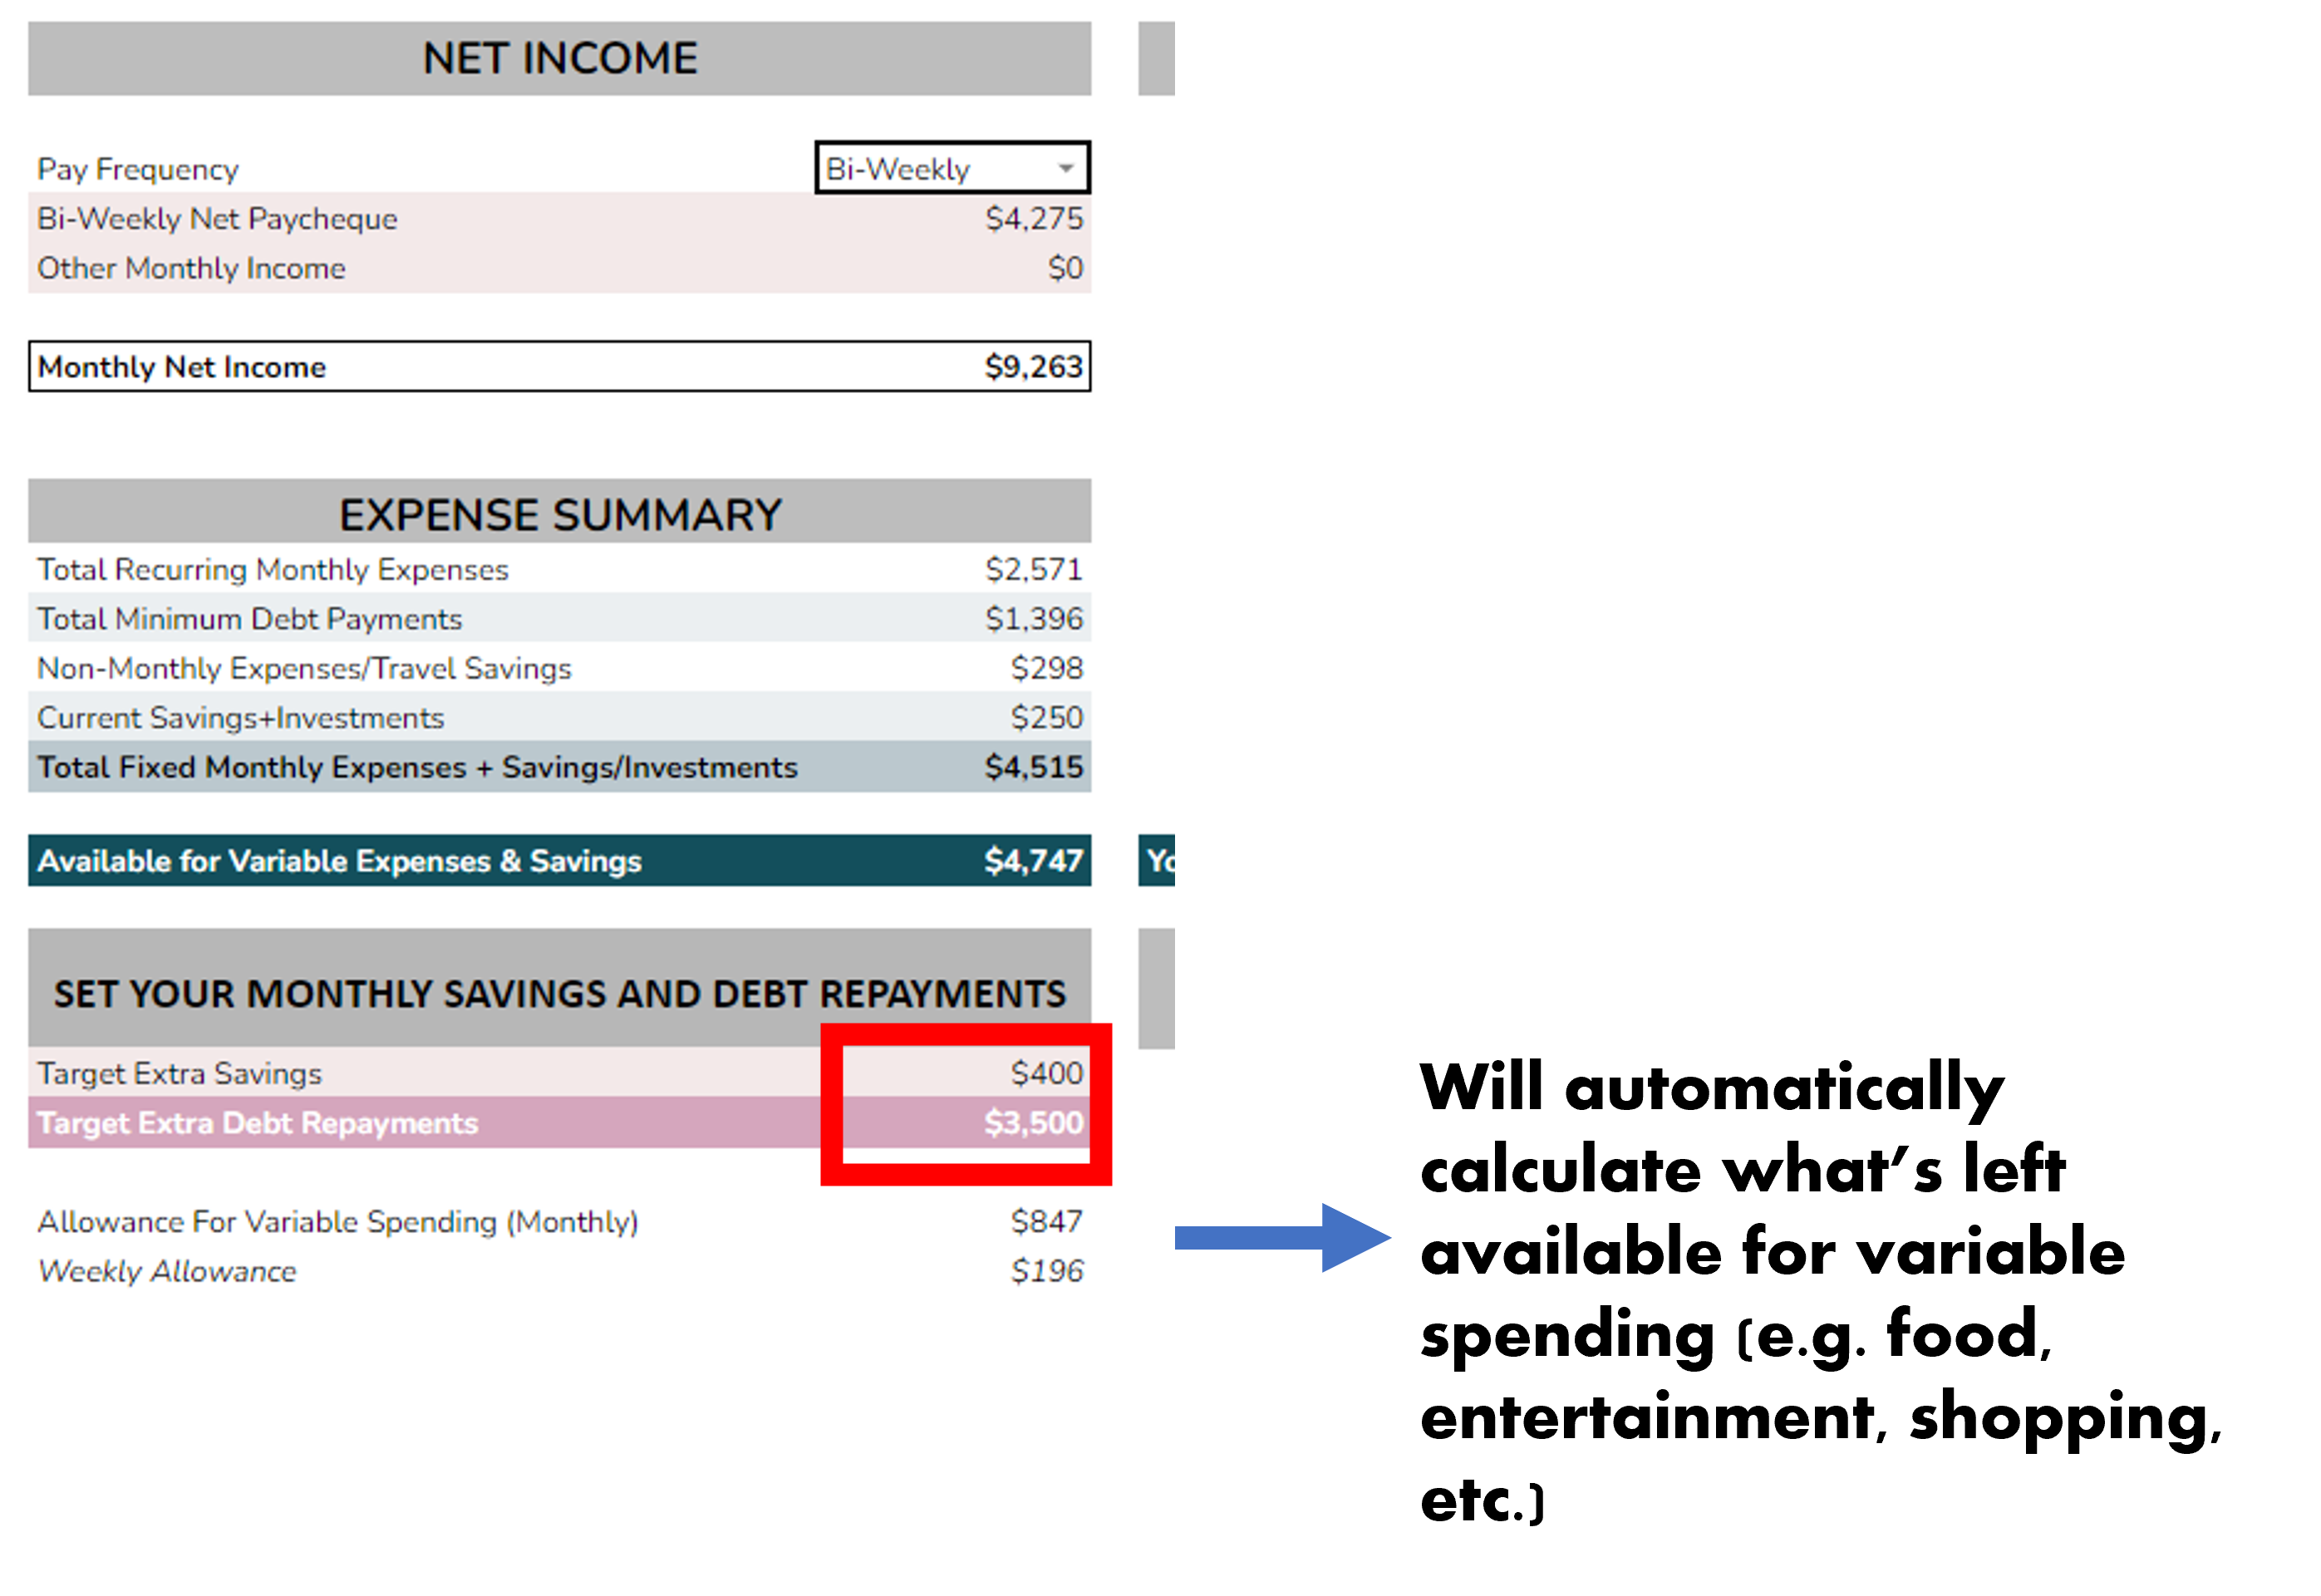
Step 5. Adjust your additional savings and additional debt repayment (beyond your current minimum payments).
Set Your Monthly Savings and Debt Repayments.
Adjust the amounts so that it sets the allowance you want to give yourself for variable spending, such as food, entertainment, shopping, etc.
For example, by setting your Target Extra Savings to $400 and Extra Debt Payments at $3,000, you're giving yourself an allowance of $847 per month, or $196 per week to spend on these expenses. Can you live off $196 per week for these items? Are you being too aggressive?
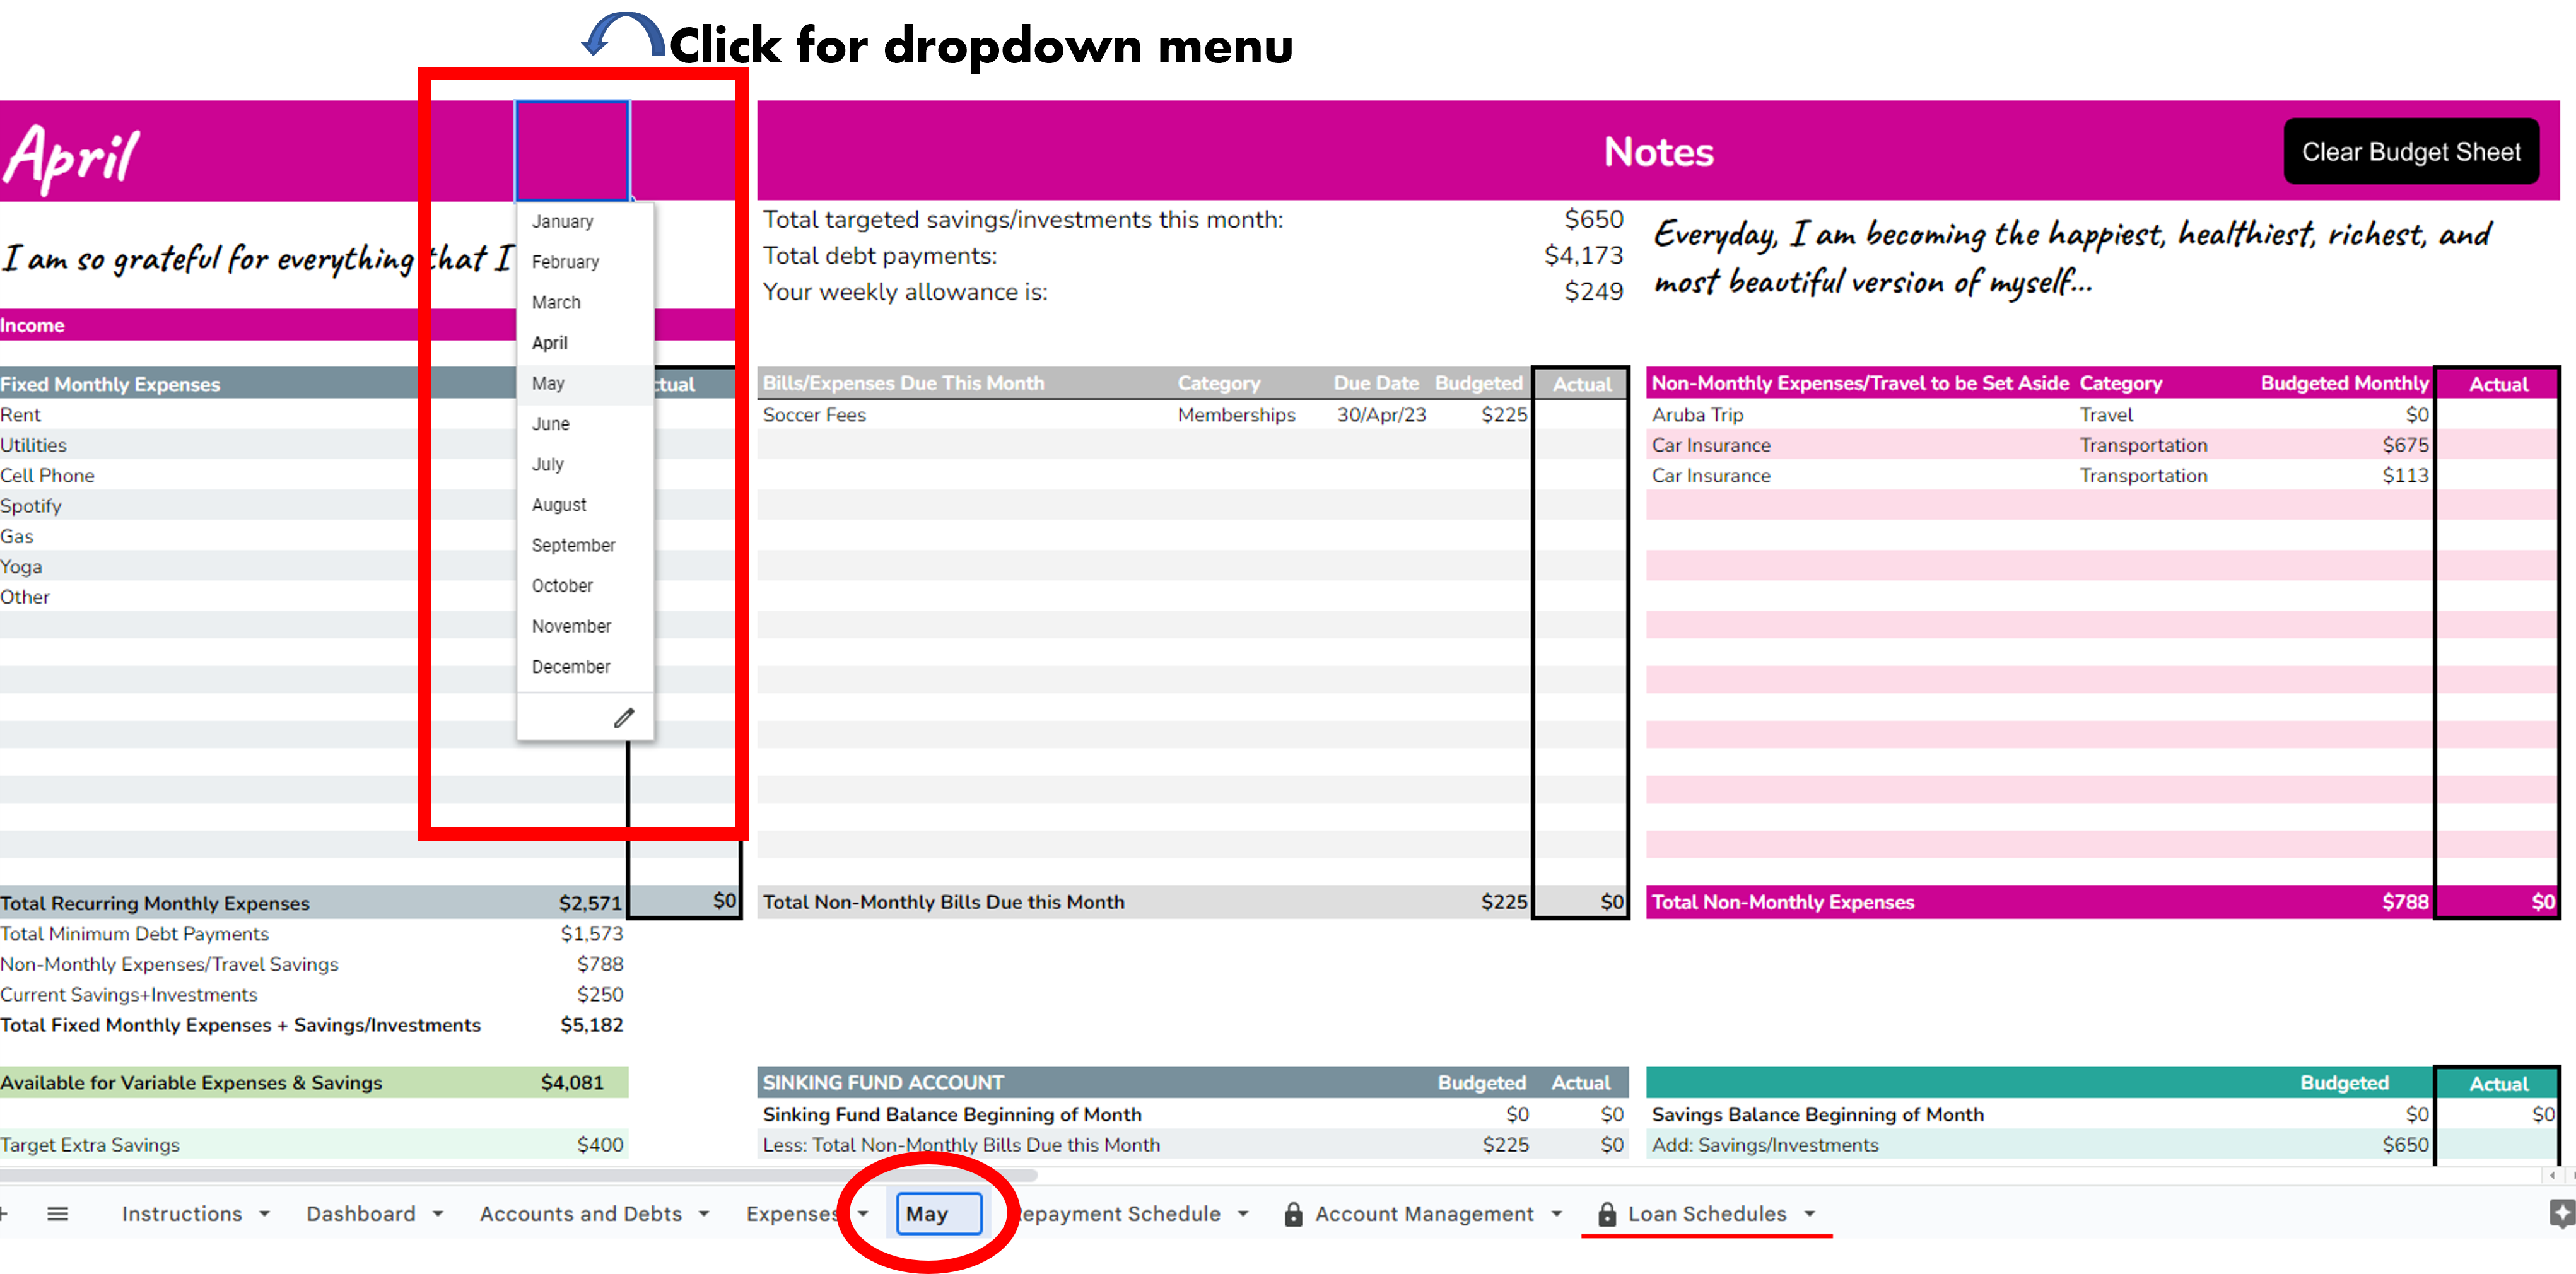
Step 6. In the "Month" tab, like April, this is where you keep track of your actual expenses
Entering in your actual expenses.
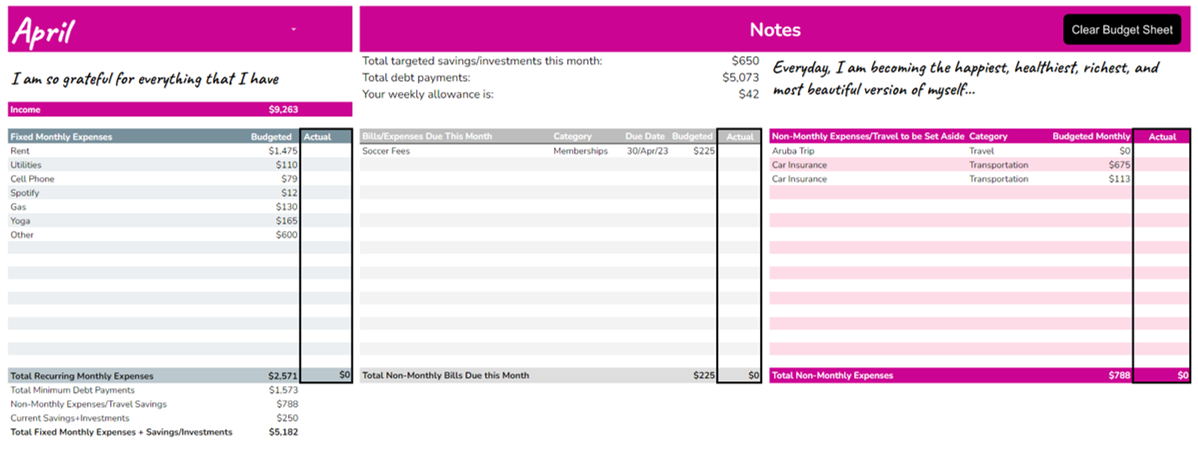
This is where you can enter in your actual payments for these budgeted expenses, including actual debt payments.. You will see in the grey chart "Bills/Expenses Due This Month", the bills that are due in the current month are automatically pulled in from the Expenses tab. These Expenses will be pulled out of your "Sinking Fund" account.
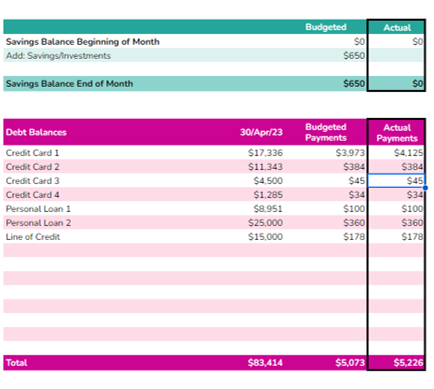
Savings and Debt Tables.
Enter in your actual total savings and investments in the green chart, and the actual debt payments in the pink table. towards each debt you have.
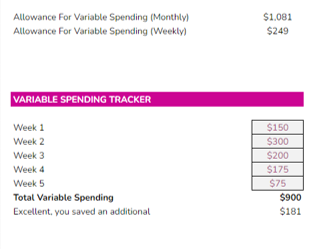
Variable Spending Tracker
Keep track of your weekly variable spending here. It will tell you how much you have left to spend for the rest of the month as you enter in your actual weekly spending on variable expenses. If you didn't spend more than your budgeted allowance, you will have extra savings at the end of the month!
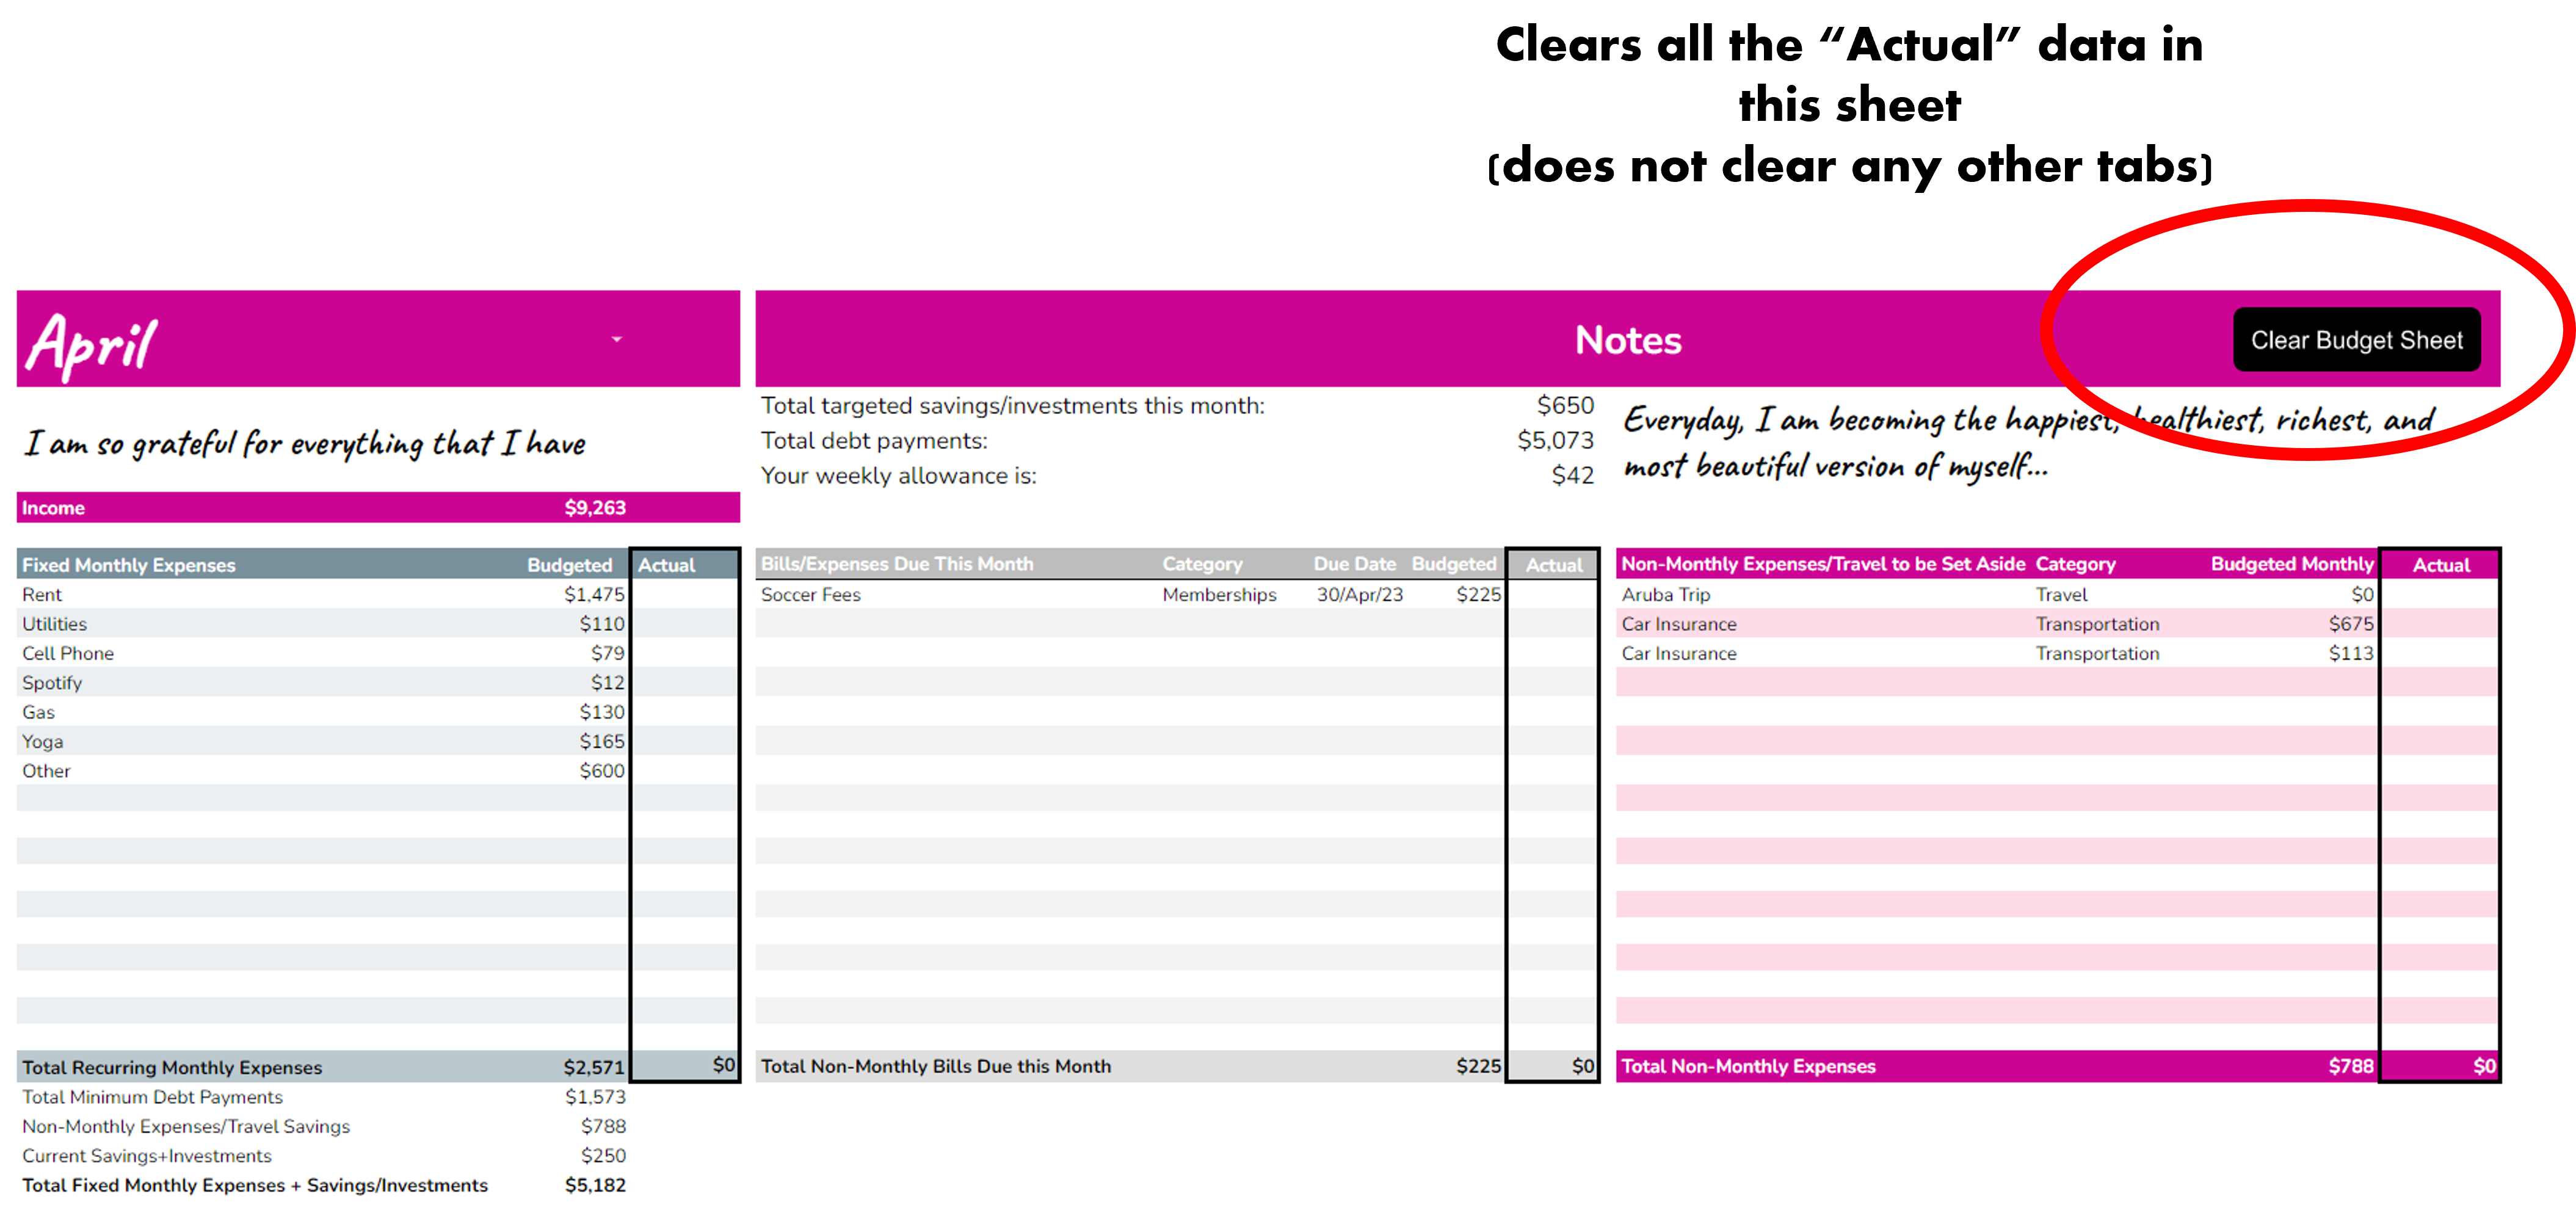
Clearing the Budget Sheet
Step 7. Repayment Schedule
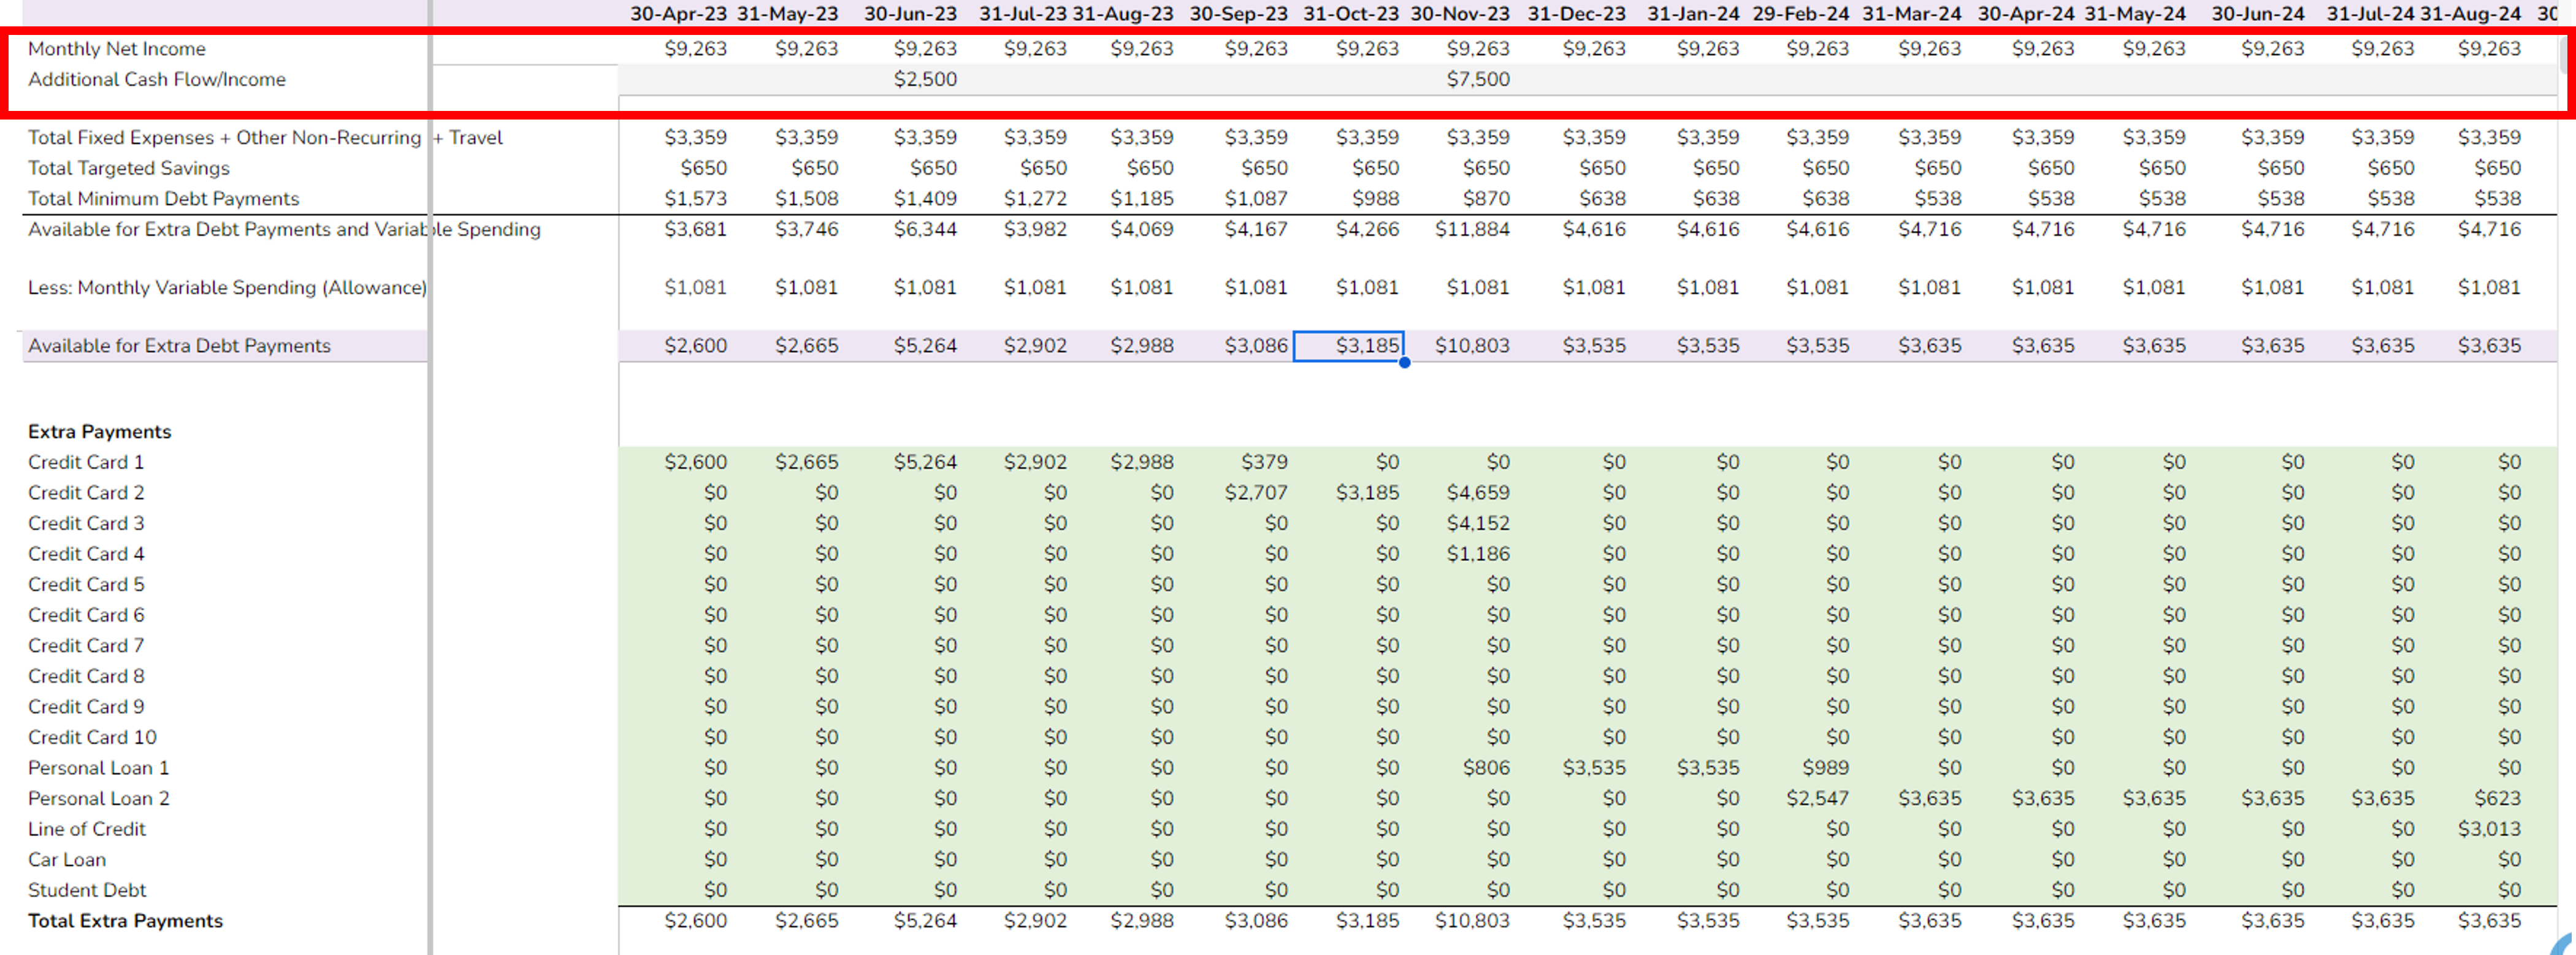
See a detailed projection of your debt repayments and add any future extra one-off incomes.
This tab is where you'll see a detailed projection of your debt repayments and savings. If you have any future anticipated one-off incomes coming in, like a tax refund or annual bonus, you can enter it here. That amount will be applied to your debt payments (in the order of how it's currently layed out). Once you are debt-free, all amounts will be flowed into the savings table.
Step 8. Account Organization
Organize Your Accounts.
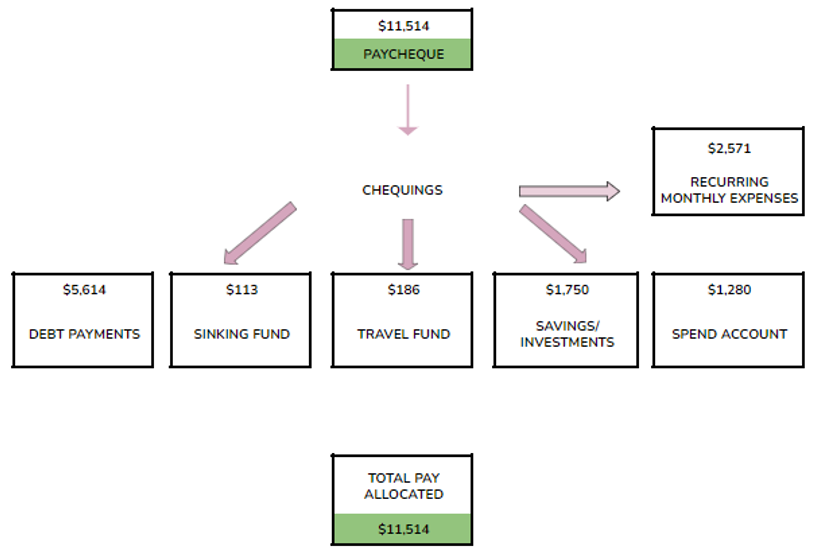
To utilize this strategy and sheet most effectively, make sure you have the following accounts:
1) Sinking Fund: to hold your non-monthly recurring expenses (e.g. bi-annual or quarterly payments)
2) Travel Fund: for your travels
3) Spend Account: for your variable spending. You want to transfer money in to this account from your chequings account each week, say every Sunday.
You can have as many savings/investment accounts.
Step 9. Starting a New Month
Do not duplicate the sheet.
Instead, change the month by using the drop down box, and then change the name of the tab at the bottom.
